|
This will be more-or-less a photo story: "Let the pictures tell the
story." Why, you might ask ? Answer ! I build this model in my spare time,
over a period of 1-1/2 years. I did not plan a story, therefore I did not write
down any building information, as to what thickness of material used, etc.
This model was somewhat much easier to build, because I had made many patterns of different items when I built the 1/32 scale
F2G-1D #57 red and
white racer back in the mid-1980's. I had planned to build #9 in 1988, but
contract models got in my way. I felt it was better to build for money,
than for pleasure.
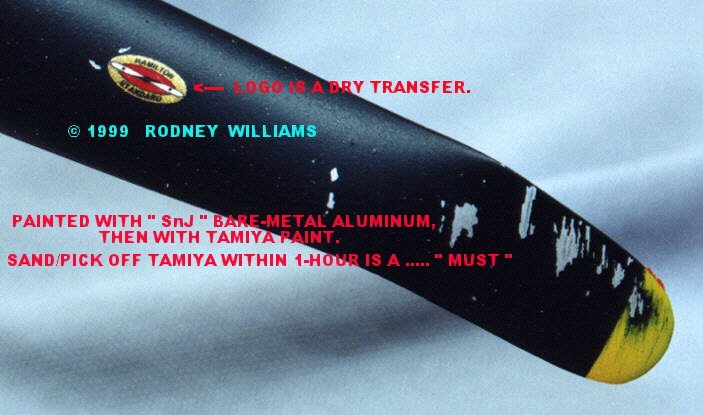
Prop hub and prop blades
| Click
on photos below to see larger photos |
 |
 |
You have seen the
real aircraft, and a shot or two of this model in my
4-part story of the Super Corsair Saga. I started re-working my old
"masters" for the prop hub, and blades. ( These blades came from
the
32-scale Hellcat). With some refinement, I had Roy Sutherland;
(d.b.a.
"Cooper Details") cast my parts in resin. Roy made enough
items, so I
completed 3-sets of blades. (I, at that time was going to build the
crashed
version, then #5 & #9.) An alignment jig is necessary, when you
assemble
this big 14' diameter prop. For the crashed A/C, I heated the cast
resin
blades over a candle, and gently bent then into shape.
|
|
Wing air intakes
|
Click on photos below to
see larger photos |
 |
 |
The front wing air inlet was different on all F2G's, so a "vac-u-form
mold,"
was made. The wing halves were glued together, then I added styrene to the
leading edge and cut out the shape from the measurements I took off the real
A/C #454 @ Champlin Museum in Mesa, Arizona. A round screen was added to
represent the oil cooler.
|
|
Click on photo
below to see larger photos |
 |
|
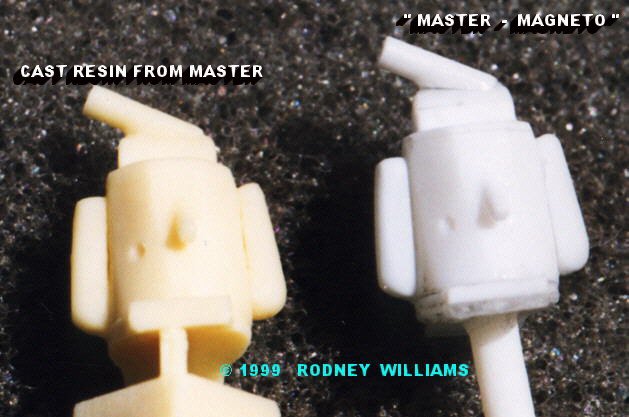
Engine and Magnitos
 |
|
Click on photos below to
see larger photos |
My engine hub was also from the Hellcat kit, I added some parts, and built
the proper style "magneto." I only added two rows of cylinders,
instead of
the normal 4, which is on the R-4360-2 engine. Your really need to add the
third row, 'cause you can see the fire wall, when looking inside.
|
|
Tail Wheel
|
Click on photos below to
see larger photos |
|
The tail wheel assembly has several parts, lucky for me, as I had made
3-sets of them way back in the mid-80's. I refined them as well. Why
I
built-in all the rib sections is beyond me, 'cause you really can't see
them, once everything is put together.
Rodney
|
|
 |
 |
 |
|
" Building a
1/32 scale F4U-1A conversion to a F2G-1D Super Corsair"
Part 2
|
" Building a
1/32 scale F4U-1A conversion to a F2G-1D Super Corsair"
Part 3
|
" Building a
1/32 scale F4U-1A conversion to a F2G-1D Super Corsair"
Part 4
|
| Cockpit and engine and engine cowling |
Wings and canopy |
Finishing touches |
|
|